How to Make Mockups in Bulk from Your Own Photos
Every design on every product, in one batch, without Photoshop and without uploading your artwork anywhere.
Quick Answer: Open the bulk mockup generator, select blank product photos (yours or the built-in ones), drop in a folder of designs, and press Generate. Each design is placed on each product, so 4 designs on 4 products gives 16 mockups. Use transparent PNG artwork, or every mockup prints the design's background box. Free makes 5 mockups per batch with no watermark; Pro makes up to 500 and downloads them as one ZIP.
Making mockups one at a time is fine for a single launch. It stops being fine when a print-on-demand shop has 40 designs and six products, or when a seasonal drop needs every design on a mug, a tote and a framed print by Friday. The bulk version of the job is simple to describe: a list of products, a list of designs, and every combination of the two. This guide walks through doing that in the browser, with a real test run so you can see what comes out.
Step by step: designs × products in one batch
- Choose your products. In Mockups, select from the built-in scenes (four realistic product scenes - a T-shirt, mug, oak frame and phone case - plus illustrated tote, notebook, cushion, postcard, laptop and bottle) or drop in your own blank product photos.
- Mark the print area once per product. Click Edit and place the four corners of the printable area. Pick a surface: flat for frames and cards, fabric for shirts and totes (with adjustable folds), or cylinder for mugs and bottles so the print wraps. Paint over anything that should sit in front of the print, like a mug handle.
- Add your designs. Drop PNG, JPEG or WebP files, or choose a whole folder. Folder import walks subfolders and skips anything that is not an image, up to 500 designs.
- Preview a pair before the whole batch. The live preview uses the same rendering as the export. Adjust fit (keep the whole design or fill the area), alignment, scale and opacity for one combination without touching the rest.
- Generate and export. Defaults are JPEG at 90% quality, 2,048 px on the long edge, named
{design}-{template}. Switch to PNG to keep transparency, or pick any size from 64 to 4,096 px. Pro exports a ZIP with one folder per design.
What a real batch produced
We ran four of the built-in sample designs onto four products (shirt, mug, tote and frame) with the default Natural print finish and no per-pair tweaks. That is 16 mockups at 2,048 × 2,048. In Chrome on a 10-core Mac they finished in 2.3 seconds, two at a time, and were saved in the browser so a reload does not lose them. Four of the sixteen:
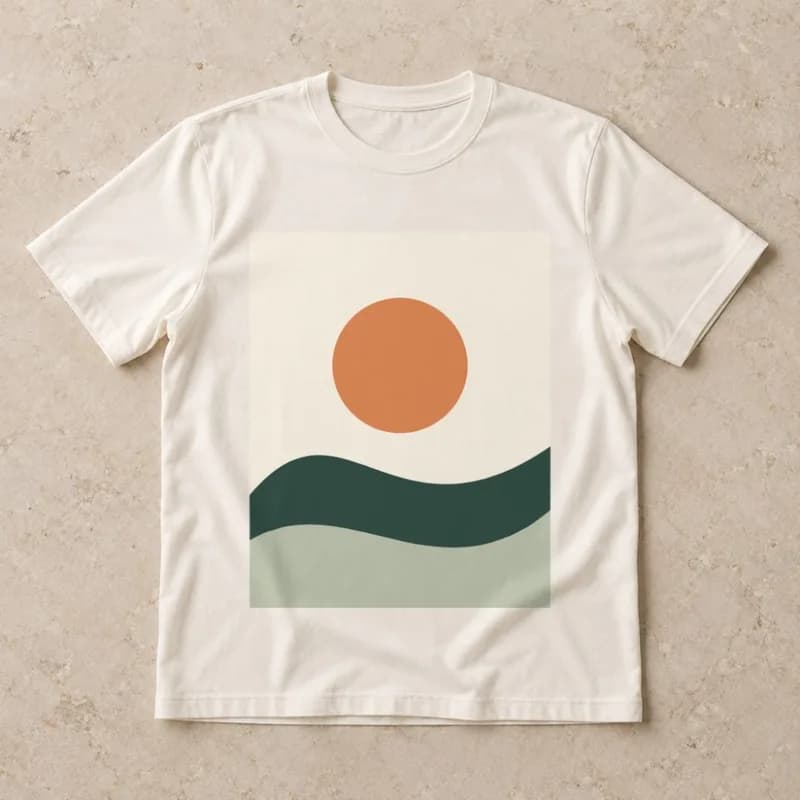
Opaque artwork: the box prints too
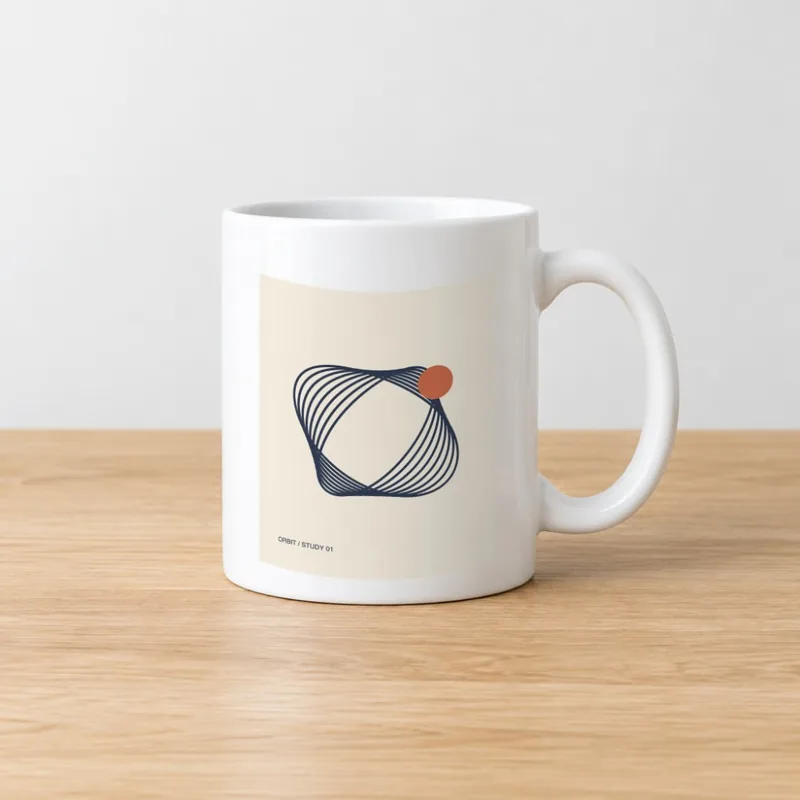
Cylinder wrap, opaque artwork
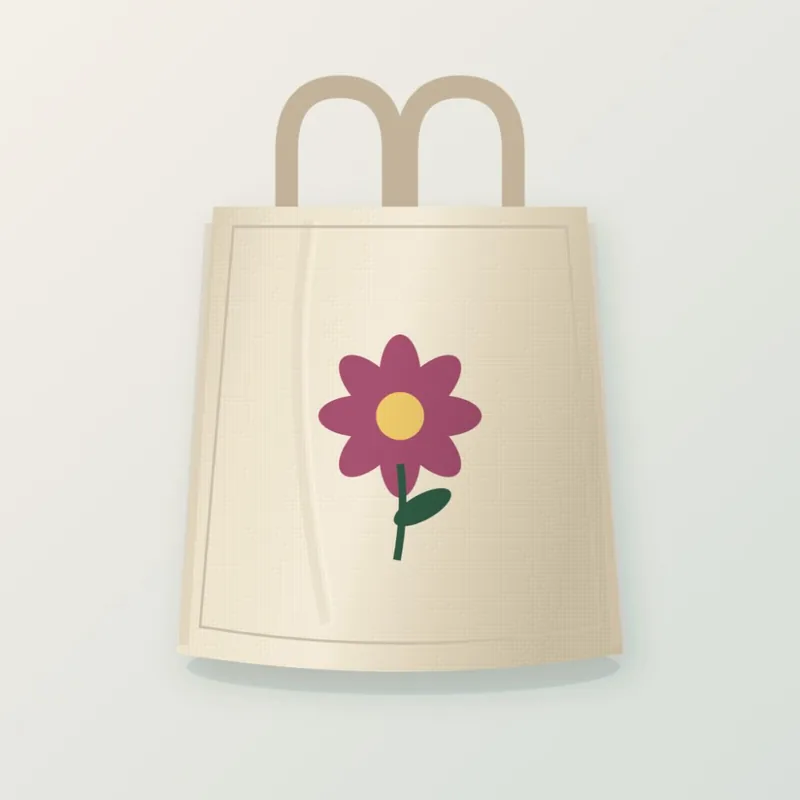
Transparent PNG: only the art prints
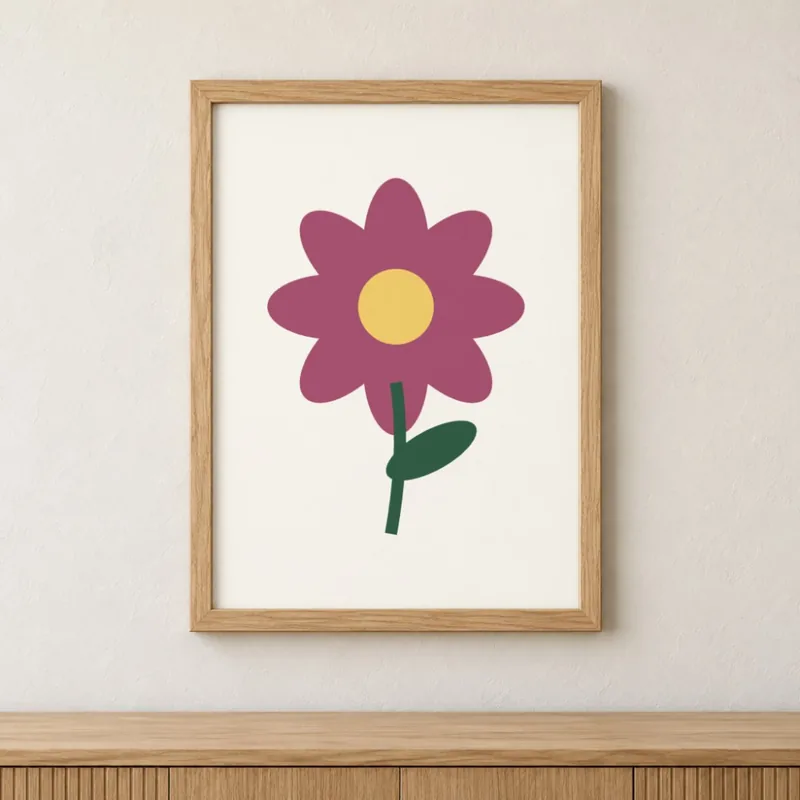
Same transparent design in a frame
What that shows:
- The artwork file decides more than the tool does. The landscape and orbit designs are JPEG-style artwork on a cream card, so the card is printed as part of the design. On a white mug it reads as a label; on a coloured shirt it would look like a patch. The flower is a transparent PNG and sits on the fabric with nothing around it. If your files have backgrounds, press Remove background on the design before generating.
- Lighting carries over. Natural print takes the shadows, fabric texture and highlights from the blank product photo and applies them over the ink, so the print does not look pasted on. That only works if the blank photo has some light and texture to borrow; a perfectly flat, evenly lit product gives a flatter result.
- It is an image-based approximation, not 3D. Folds and the mug curve are estimated from the photo. Deep creases, a sleeve crossing the chest, or a product at a steep angle will not wrap convincingly. Check those in the preview before you run 500 of them.
Using your own product photos and PSDs
Your own blank product photos are usually the better choice: buyers see the actual garment colour and the same set across every listing. Shoot or buy the blank once, mark its print area once, and every future batch reuses it. Front and back are separate templates.
Photoshop mockup PSDs are supported with one honest caveat: the tool reads the saved composite, not the live Smart Object. It does not swap your design into the Smart Object the way Photoshop does; it imports the flattened picture and lets you mark where the print goes. So start from a PSD that is blank, or whose placeholder is plain. If it has one visible Smart Object with clean four-corner geometry, that position is suggested as the print area. Files must be 8-bit RGB, under 50 MB and 64 megapixels; for a PSD with no usable composite, re-save it in Photoshop with Maximize Compatibility on.
Free vs Pro, without the fine print
| Free | Pro | |
|---|---|---|
| Mockups per batch | 5 | 500 |
| Watermark | None | None |
| Download | One image at a time | ZIP, grouped by design |
| Templates, print-area setup, preview | Unlimited | Unlimited |
Pro is a one-time license, not a subscription; current pricing is on the pricing page. The same license covers the other Studio tools, including CSV design variations and campaign sizes.
Other ways to make mockups in bulk
- Photoshop Smart Objects with actions or scripts. The most control: real Smart Object replacement, displacement maps, any effect you can build. Also the most setup, and each batch runs inside a desktop app.
- Hosted mockup libraries. Large catalogues of professionally shot scenes and models, often with a bulk mode. You upload your designs to their servers, and free tiers commonly cap output or resolution; check the current terms on the vendor's own page before relying on one.
- Your print-on-demand platform's generator. Accurate to that platform's blanks and print areas, which is exactly what you want for that store. Less useful when you sell the same design across several platforms or want a consistent look of your own.
The browser approach fits when the products are yours, the designs are unreleased, or the batch is large enough that per-image credits would add up. If you are preparing the artwork itself, the T-shirt design background guide covers getting a clean transparent PNG first.
Frequently Asked Questions
How do I make mockups in bulk for free?
Open the Backgroundless bulk mockup generator, pick or upload blank product photos, add a folder of designs, and press Generate. Every design is placed on every selected product. The free tier makes up to 5 mockups per batch with no watermark and individual downloads; Pro raises that to 500 per batch with a ZIP download. Everything runs in your browser, so neither the product photos nor the artwork are uploaded.
Can I use my own product photos as mockup templates?
Yes. Upload a blank product photo as PNG, JPEG, WebP or PSD, then mark the print area by placing its four corners. Choose a flat, fabric or cylinder surface so the design follows the product, and paint over anything that should stay in front of the print, such as a mug handle. The template is saved in your browser and reused for every batch.
Can I use a Photoshop mockup PSD?
You can import one, with a limit worth knowing. The tool reads the PSD's saved composite image, not its live Smart Objects, so anything already in the file is baked in. Start from a blank mockup. When the PSD has a single visible Smart Object with clean four-corner geometry, its position is suggested as the print area. The PSD must be 8-bit RGB, under 50 MB and 64 megapixels; CMYK, 16-bit and PSB files are rejected with a note on how to re-save them.
Why does my design show a white or colored box on the product?
Because the artwork file has a background, and a mockup prints the whole file. A JPEG or an opaque PNG carries its rectangle onto the shirt or mug. Export the design as a transparent PNG, or use Remove background on the design inside the mockup tool before generating.
Are my designs uploaded to a server?
No. Placement, lighting and export all run on your device. The built-in starter scenes and the optional background-removal model are downloaded to your browser, but your own photos and artwork are read from local files and stay in browser storage.
Keep Reading
- Remove Background for T-Shirt & Print-on-Demand Designs - get transparent artwork before you place it
- Canva Bulk Create Alternative - one template, a CSV, and hundreds of designs
- Resize One Design to Every Social Media Size - square, portrait, story and banners from one layout
- Bulk Background Removal: Download Checklist - when the product photos need cutting out first
Make your first batch of mockups
Free, no watermark, no upload. Sample designs included if you want to try it first.
apparelOpen Mockups