Transparent PNG at 300 DPI for Print on Demand
The pixel size your shirt file needs, what we got from a real background removal at 4,500 x 5,400 px, and the two problems worth checking before you upload to Printful or Redbubble.
Quick Answer: At 300 DPI, a 12 x 16 in front print needs a 3,600 x 4,800 px transparent PNG, and 15 x 18 in needs 4,500 x 5,400 px. The DPI number saved in the file does not matter; the pixels do. Printful gives 150 DPI as the minimum for most of its products, which is 1,800 x 2,400 px for 12 x 16 in. Check your file with the print-size check below, then look at the cutout on a dark background before you upload.
Pixels, not DPI
A print shop prints a number of pixels over a number of inches. Divide one by the other and you get the resolution of the print. That is the whole calculation:
| Print size | At 300 DPI | At 150 DPI |
|---|---|---|
| 10 x 12 in | 3,000 x 3,600 px | 1,500 x 1,800 px |
| 12 x 16 in | 3,600 x 4,800 px | 1,800 x 2,400 px |
| 15 x 18 in | 4,500 x 5,400 px | 2,250 x 2,700 px |
Our free cutout exports carry a 72 DPI tag (we read it from the 4,500 x 5,400 px export in the run below), and they print exactly as their pixel count allows; changing the tag to 300 changes nothing on the shirt. Some uploaders and print tools still read the tag, so Pro's batch export can write 300 DPI metadata into the files; that is a label for those tools, not extra detail. What the printer cares about is the file's pixel size against the product's print area.
What Printful and Redbubble ask for
- Printful recommends PNG with a transparent background for DTG, because a JPEG's background prints as a box. Its guide gives 150 DPI as the minimum for most products (some, such as stickers and phone cases, need 300), and lists 12 x 16 in as the standard T-shirt print area, up to 15 x 18 in on select DTG products (Printful DTG guide). Each product's File guidelines tab has the exact template.
- Redbubble accepts PNG and JPEG and shows a size warning per product when a file is too small. Third-party guides quote several different minimums for T-shirts and we could not confirm one on Redbubble's own pages, so we are not repeating a number here: upload a file at least as large as the 300 DPI column above and read the warning in the uploader.
A real run: removing a white background at 4,500 x 5,400 px
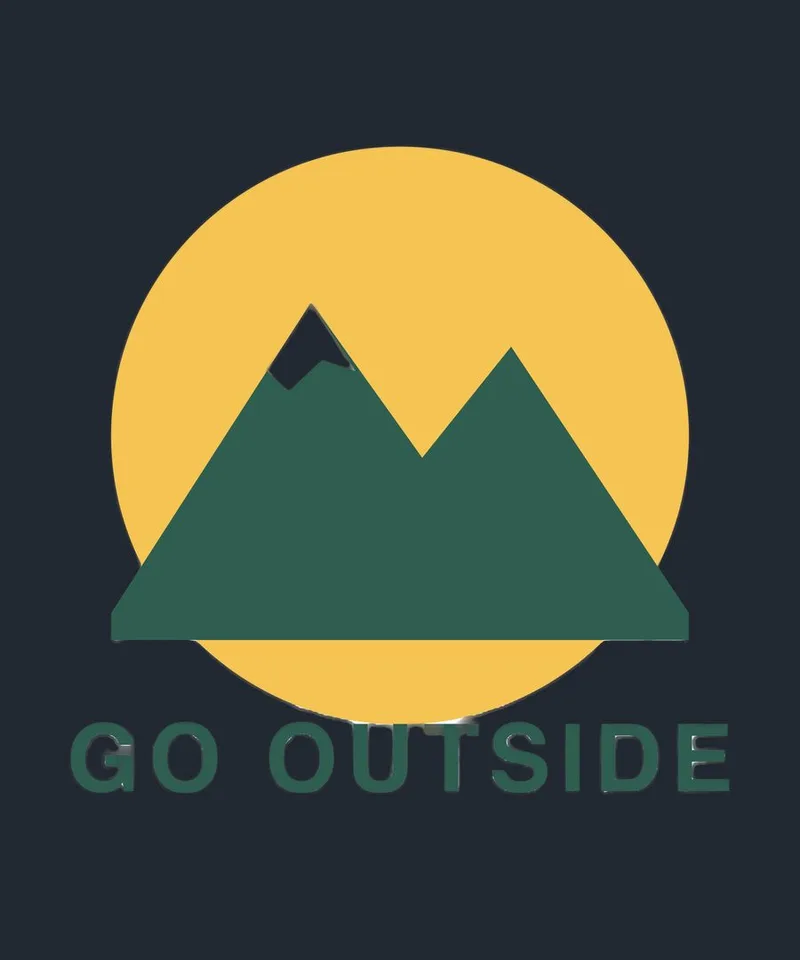
Sellers often have a design only as a JPEG on white: a client file, an old export, an AI image. We made a test design for this guide, a sun-and-mountain badge with “GO OUTSIDE” lettering on a white background, saved it as a 4,500 x 5,400 px JPEG and a 1,500 x 2,000 px JPEG, and ran both through the free bulk background remover in Chrome on an Apple M4 Mac.

The input: design on white
The cutout on a dark background
- Size kept (desktop): the large file came back as a 4,500 x 5,400 px transparent PNG (2.2 MB), the small one as 1,500 x 2,000 px. Both were ready 17 seconds after we dropped them in, including the first-time model warm-up. On a phone, or a computer with 4 GB of memory or less, the working copy is capped at about 2 megapixels, so the same 4,500 x 5,400 file would come back at about 1,320 x 1,590 px: do print files on a desktop.
- Problem 1, white inside the design was removed. The snowcap on the mountain is white, the same as the background, and it came out transparent. On a white shirt you would never notice; on a black shirt the peak shows the shirt colour.
- Problem 2, a light fringe around the lettering. Close up on a dark background, the letters carry a thin grey rim where anti-aliased edge pixels blended with the white. On a dark garment that rim can print as a faint outline.

What we take from it: background removal is the right tool when the design only exists on a background. If you made the design yourself, export it with a transparent background from the design app instead; that keeps white parts and clean edges by construction. Either way, look at the PNG on a dark background before you upload, which is exactly how a black shirt will show it.
The print-size check on both files
The check in the three steps at the end of this page reads the PNG in your browser and does the arithmetic above. Our two files:
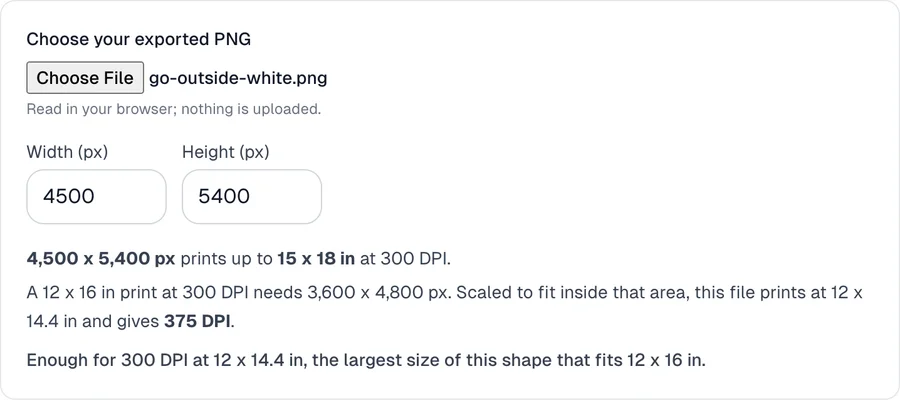
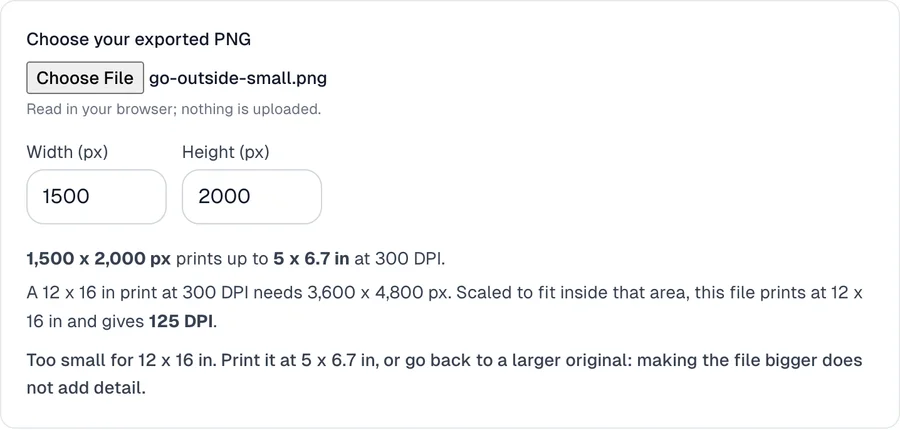
The small file is a 5 x 6.7 in print at 300 DPI. It would pass for a pocket print, not a full front. We do not offer to upscale it: a bigger file made from the same pixels has no more detail. Go back to the larger original, or print smaller.
Then: see it on the shirts you sell
Once the PNG is the right size, put it on the T-shirt mockup generator. Five shirt colours are ready, including black and navy, so a white-edge or contrast problem shows up before the listing does. We ran exactly that in T-shirt mockups without Photoshop.
Frequently Asked Questions
What size PNG do I need for a 300 DPI T-shirt print?
Multiply the print size in inches by 300. A 12 x 16 in front print needs 3,600 x 4,800 px; 15 x 18 in needs 4,500 x 5,400 px. At 150 DPI, which Printful gives as the minimum for most of its products, 12 x 16 in needs 1,800 x 2,400 px.
Does changing the DPI setting in my file make it print better?
No. The DPI number stored in a PNG is a label. Print size is pixels divided by the DPI you print at, so a 1,500 x 2,000 px file is 5 x 6.7 in at 300 DPI whatever the label says. Our free cutout exports are tagged 72 DPI (we checked the 4,500 x 5,400 one) and print exactly as their pixel size allows.
Can I upscale a small design to 300 DPI?
Enlarging a file adds pixels, not detail. For flat graphics, re-export from the original design file at the larger size. For a photo or a raster-only design, print it smaller or find a larger source; Backgroundless does not upscale.
Does background removal keep the full resolution?
On a desktop with enough memory, yes: our 4,500 x 5,400 px test design came back as a 4,500 x 5,400 px transparent PNG. Phones, and computers with 4 GB of memory or less, work on a smaller copy of about 2 megapixels, so the same file comes back at about 1,320 x 1,590 px, which is a 4.4 x 5.3 in print at 300 DPI. Check the exported pixel size before printing, and remove backgrounds for print files on a desktop.
Keep Reading
- Remove Background for T-Shirt Designs - platform notes and common file mistakes
- T-Shirt Mockup Without Photoshop - one design on five shirt colours
- Etsy Mockups in Bulk - every design on every product you list
From design to T-shirt listing in three steps
- 1
Remove the background
Drop the design into the remover and download it as a transparent PNG. It runs in your browser, so unreleased designs are not uploaded. Use a desktop for print files: phones and low-memory computers work on a copy of about 2 megapixels.
Remove background free - 2
Check the print size
Print quality depends on pixels, not on the DPI number saved in the file. Pick the PNG you downloaded to see how large it prints at 300 DPI against a 12 x 16 in front print.
Read in your browser; nothing is uploaded.
Pick the file or type its size to see the print size.
- 3
Put it on T-shirt mockups
Add the same PNG to the T-shirt mockup generator: five shirt colours are ready, 5 mockups per free batch, no watermark.
Make T-shirt mockups